Caption: The Alien.
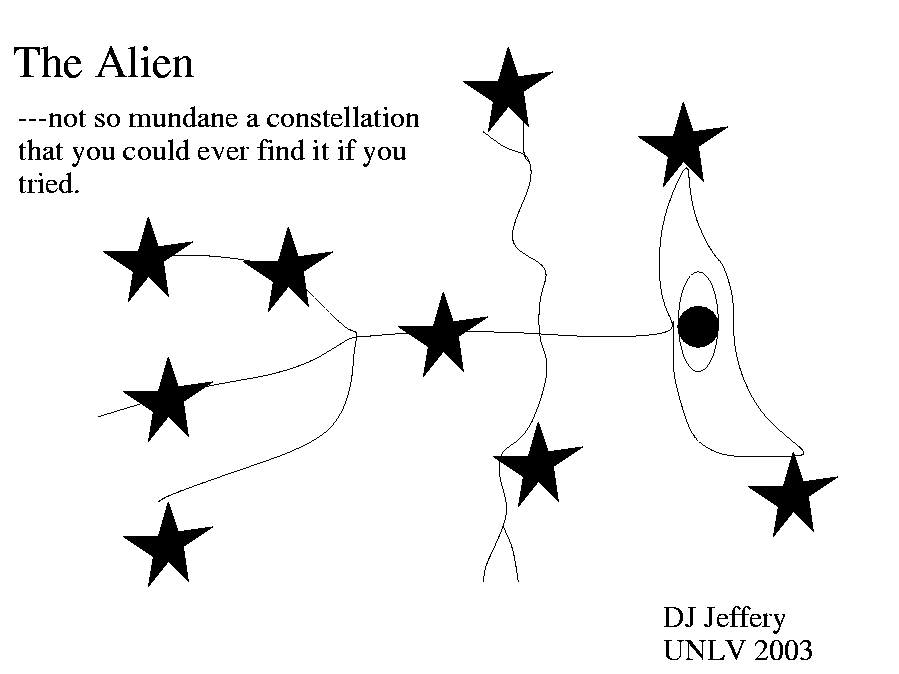

Caption: The Alien.
Supplementary Lab Preparation: The items are often alternatives to the required preparation and to each other.

Caption: A scholarship examination, 1940 Apr16, Australia.
They are all in their own little worlds.
Credit/Permission: Anonymous photographer, 1940 (uploaded to Wikipedia by John Vandenberg (AKA User:SLQbot), 2010) / Public domain.
Image linked to Wikipedia.
The quiz might be omitted if it's not feasible or convenient. The students may or may not be informed ahead of time of quiz omission depending on the circumstances.
The quizzes in total are 40 % of the course grade. However, only the top five quiz marks are counted.
In preparing for a quiz, go over the Required Lab Preparation.
The Supplementary Lab Preparation (see above) could help, but is only suggested if you feel you need more than the required Required Lab Preparation.
There is no end to the studying you can do, but it is only a short quiz.
One to two hours prep should suffice.
There will be 10 or so questions and the time will be 10 or so minutes.
The questions will range from quite easy to challenging.
The solutions might be posted at Constelllations: Quiz Solutions after the quiz is given. Whether they are or not depends on the circumstances of each individual semester.

Caption: Plato (428/427--348/347 BCE) and Socrates (circa 469--399 BCE) in a Medieval image.
Here the disciple seems to be instructing the master/mentor using the Socratic method.
The basic pose is much like in intro labs.
Credit/Permission: Medieval artist, Middle Ages (probably 1000--1400) (uploaded to Wikipedia by User:Tomisti, 2007) / Public domain.
Image linked to Wikipedia.

Caption: "Red foxes (Vulpes vulpes) at the British Wildlife Centre, Horne, Surrey, England." (Slightly edited.)
Credit/Permission: © Keven Law, Photo 2008 Aug17 / Creative Commons CC BY-SA 2.0.
Image linked to Wikipedia.
This lab is designed to give students a general orientation in observing the
sky.
We can break that down a bit.
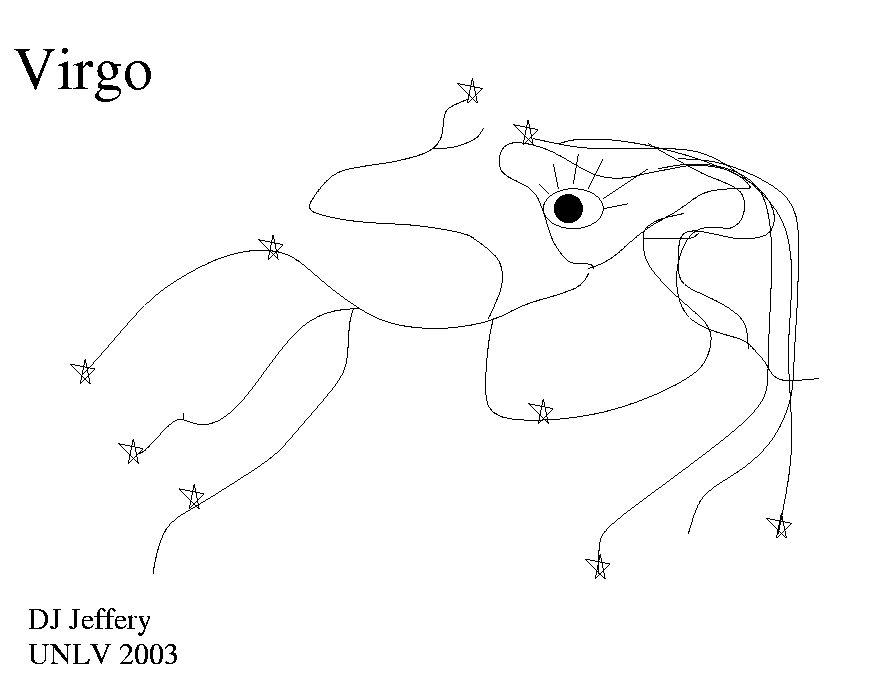
Caption: Virgo.
Just a schematic diagram.
Answer any questions requiring sentences with sentences.
You can certainly peer review
each other, but do not directly copy.
To make such maps we project all astronomical objects
on an infinitely remote imagined sphere centered on the
Earth's center.
The sky maps show all or part of this sphere.
The sphere is called the celestial sphere.
The sky obviously looks like
a giant sphere surrounding the Earth
and the astronomical objects
show no distance variation at all to simple observations.
As far as we can tell from simple observations, the
astronomical objects
could all be pasted on the celestial sphere.
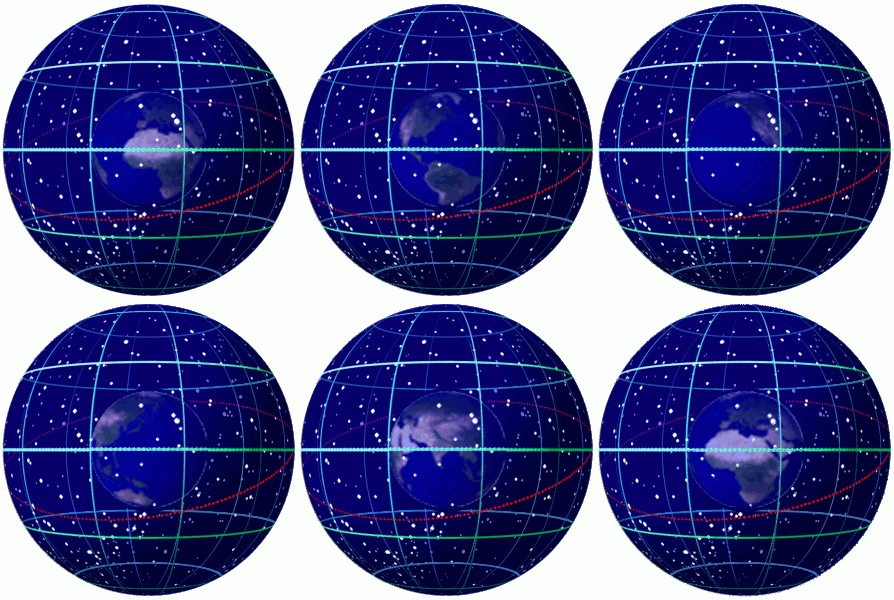
Caption: An animation of the
Earth rotating
eastward within
celestial sphere
with lines of right ascension (RA)
and declination (Dec),
the celestial equator,
and the ecliptic.
The celestial sphere is not to scale.
It should be quasi-infinte compared to the Earth---but that is
undrawable.
If one took the Earth as a
reference frame as we do in everyday life,
then the
celestial sphere would rotate
westward
as, in fact, we usually consider it to be doing.
Credit/Permission:
© User:Tfr000,
2012 /
Creative Commons
CC BY-SA 3.0.
Image linked to Wikipedia.
The most usual angular coordinates for
sky maps
are the equatorial coordinates
with the coordinates individually being
right ascension (RA)
and declination (Dec).
The
right ascension
and declination
are analogous to, respectively,
longitude
and latitude on the
2-dimensional spherical surface of the
Earth.
For the celestial sphere,
we are actually on the inside looking out.
On the other hand, when we plot the whole
celestial sphere
on a spherical surface to make a
celestial globe,
we are on the outside looking at the
celestial sphere.
There should be
celestial globes
set out for your inspection.
Caption: An all-sky sky map displaying
the equatorial coordinate system,
the ecliptic,
the constellations
and the Milky Way.
The left-hand side is the summer
night sky
and the right-hand side is the
winter
night sky.
As an observational object to the
naked eye,
the Milky Way is a faint white
band on the sky---or road on
the sky---the
Milky Way.
We see it like this because the Solar System
is embedded Galactic disk
about 8 kpc from the Galactic center.
The Galactic center is in the
constellation
Sagittarius.
In the Northern Hemisphere,
Sagittarius
is low in the southern sky in the summer
night sky.
Actually, we do NOT see very far in the
Galactic disk
(a few kiloparsecs)
in the visible
because of the obscuration of
interstellar dust.
Credit/Permission:
© User:Tfr000,
2012 /
Creative Commons
CC BY-SA 3.0.
Image linked to Wikipedia.
In later labs, we will do more with the
celestial sphere,
equatorial coordinates,
and
sky maps.
Caption: The Astronomer
by Johannes Vermeer (1632--1675).
The model
for the astronomer of the
painting may have been
scientist
Antonie van Leeuwenhoek (1632--1723
who must have known Vermeer well
since executor
of Vermeer's
will.
The astronomer of the
painting is examining a
celestial globe
which is a representation of the
celestial sphere.
Credit/Permission:
Johannes Vermeer (1632--1675),
circa 1668
(uploaded to Wikipedia
by User:Jarekt?,
2011) /
Public domain.
Image linked to Wikipedia.
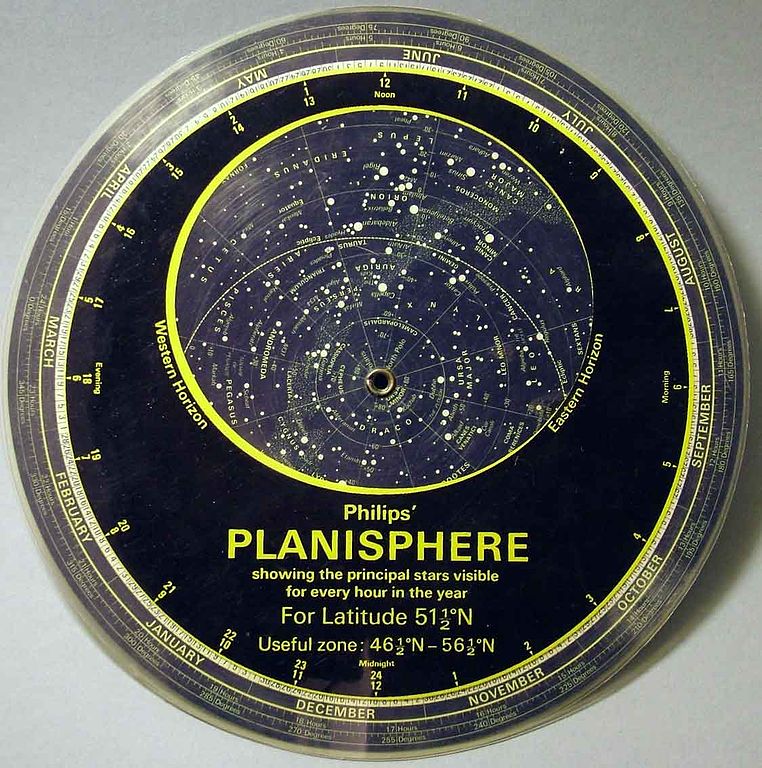
Caption: Planisphere.
The planisphere is a
descendant of the ancient astrolabe.
It is a kind of analog computer
if one uses the word computer very broadly.
Not all planispheres
look like this, but there are basic simimilarities.
One of our astrononomy laboratory
planispheres
has square overlay and square base.
The planispheres are usually held
in "diamond" orientation, not "square" orientation, with north at the top.
On the overlay are the ordinary
hours of the 12-hour clock:
am on the left,
pm on the right.
There is rotating circular sky map
on an axis sandwiched between the overlay and the base.
The axis is the north celestial pole (NCP).
The sky map has the days of year
marked around its outer edge.
You rotate the sky map until, the
day of the year for which you want to know the sky
aligns with the clock time for which
you want to observe the sky.
In the oval window of the overlay, you see approximately the sky
for that day and time.
The edge of the oval is approximately the horizon.
East is the left,
west is on the right.
A day passes, objects rise on the east of the oval and set on the
west.
Circumpolar objects
never go below the horizon:
they just rotate counterclockwise about the
NCP.
A planisphere
does show all the sky above the
horizon for its specified range
because the oval is set to show more sky than the
horizon allows.
Our planispheres
are for 40 degrees north latitude
and for that latitude
show the sky to about -50 degrees
declination (Dec)
and to about 40 degrees below the
NCP
in the direction of the northern horizon
(see bottom of page 4 of the instructions).
So the our planispheres
are about right for Las Vegas, Nevada
which has coordinates 36 deg 10'30" N, 115 deg 08'11" W.
Credit/Permission:
© User:Wammes Waggel,
2006 /
Creative Commons
CC BY-SA 3.0.
Image linked to Wikipedia.
There is nothing hard in understanding this projection onto the
celestial sphere.
Of course, for the Earth,
we usually picture ourselves as outside looking down on it.
An example of an all-sky sky map
is below.
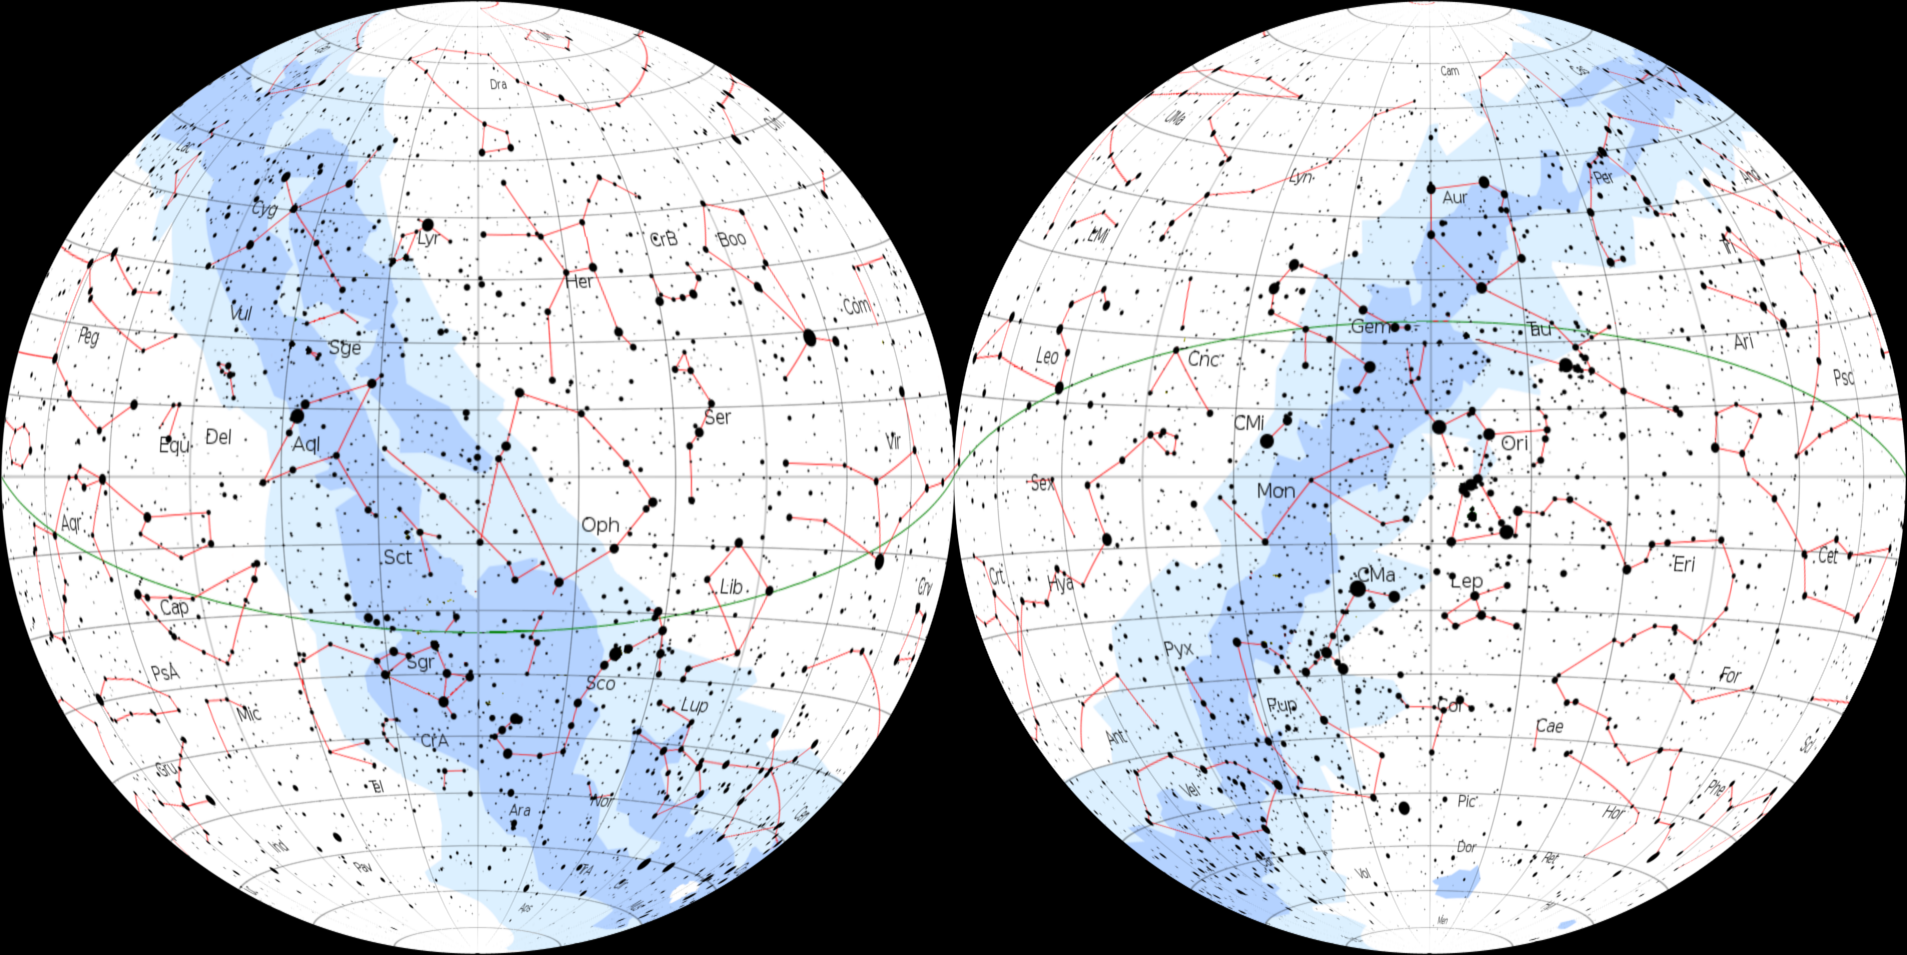
The summer
night sky is the
winter day sky and the
winter
night sky is the
summer day sky.
But, of course, you don't see the stars
in daytime usually.
They are lost in the
diffuse sky radiation
(the blue sky) caused sunlight
scattering in the
Earth's atmosphere.
The left direction is eastward on the
sky map as is conventional in
sky maps.
The convention is probably because in the
Northern Hemisphere
we usually think of ourselves as facing south
when tilting our heads up to view the sky.
Viewing the sky
this way puts the east on the left-hand side.

North is at the top of the oval,
south is at the bottom.
A planisphere is
designed only for a specified range of
latitudes.
It will not show all the sky above the
horizon outside
of that range and if you are too far out, none of the sky
above the horizon.
ENIAC was the first electronic general-purpose computer.
Credit/Permission: U.S. Army photograph, c. 1947--1955 / Public domain.
Image linked to Wikipedia.
If needed during this lab, you can refer back to the TheSky intro and the List of Tricks for TheSky.
The instructor can also help with problems with the TheSky.
TheSky has an online help if all else fails.
In fact, we don't make use of the tables in order.
Then draw a contour line around the whole constellation.
Location can be described using words such as north, south, east, west, or combinations of these, as high or low, as near zenith or near the horizon.
Just locate them reasonably.
Actually, often we just locate a constellation by locating a bright star in it. Frequently, that's all one can find/recognize for sure.
You will have to use TheSky to get the required data.
Use 9:00 pm for today's date .
Set this time and date on TheSky.
TheSky does NOT automatically set the date.
Caption: Three kinds of horizon.
We use the astronomical horizon in this lab.
Credit/Permission: User:Acdx, 2006 (uploaded to Wikipedia by User:Liftan, 2007) / Public domain.
Image linked to Wikipedia.
For the summer and winter sky maps, drawing the horizon is straightforward if you can make TheSky show the horizon in Mercator projection
This can be done, but it takes a few steps that detailed in List of Tricks for TheSky.
For the polar sky map a variety of approaches help.
Identify the constellations the horizon crosses or skirts and use those constellations as your guide.
Your done summer and winter sky maps, will help.
TheSky in stereographic projection will show the horizon in the neighborhood of the celestial poles
There is no uniquely good way of mapping (i.e., projecting) a spherical surface to a flat surface. There is always some distortion. When you are comparing to maps with different projections of the same thing, it takes some practice to compensate for the different distortions.
The oval window's edge on the planisphere is approximately the horizon. This can be useful in guiding your drawing of the horizon.
In fact, using the planisphere to find the horizon location may be good enough if your good at mentally adjusting for different projections.
Add an extra column on the left-hand side of Table 1.1 with heading "Observed". Here you will indicate whether bright star was actually observed from the roof and if not, why not: e.g., cloud cover, building, etc. in the way, below the horizon, or just could not find.
In the "Time Observed" column just use 9:00 pm in all cases.
The Table 1.1 is crude lesser cousin of ephemerides (singular ephemeris)---tables of predictions for positions of astronomical objects---see the figure below for a Medieval ephemeris page.

Caption: An ephemeris page from Corpus Christi College, Oxford or Corpus Christi College, Cambridge, Manuscript 283, circa 12th century.
The plural of ephemeris is ephemerides.
The image itself is from Otto E. Neugebauer's (1899--1990) The Astronomical Tables of al-Khwarizmi (1962).
Al Khwarizmi (c. 780--c. 850) was a Persian, mathematician, astronomer, and geographer.
Among other things he wrote the book Al Jabr (c. 820) from whose title we derive the word algebra.
Al Khwarizmi's own name mutated into the modern word algorithm.
Credit/Permission: Anonymous Medieval Islamic astronomer, 12th century (uploaded to by Ruud Koot (AKA User:R Koot), 2006) / Public domain.
Image linked to Wikipedia.
This part is actually best done simultaneously with part 3.
This part of the Startup Presentation should usually be given then, NOT at the beginning of the lab.
We CANNOT wait until later.
Most students should be mostly done the inside work by then.
You should check the Sky map: Las Vegas, current time.
Outside directions and rules:

Caption: Human eye.
Credit/Permission: © Petr Novak, Wikipedia (AKA User:Che), 2005 / Creative Commons CC BY-SA 2.5.
Image linked to Wikipedia.

Caption: Ernest Shackleton (1874--1922), Captain Robert Falcon Scott (1868--1912), and Dr. Edward Adrian Wilson (1872--1912) on the Discovery Expedition (AKA the British National Antarctic Expedition, 1902 Nov02.
Brisk in Antartica.
Credit/Permission: Anonymous photographer, 1902 (uploaded to Wikimedia Commons by User:Jamiri, 2009) / Public domain.
Image linked to Wikimedia Commons.
Go to the near ones if they are unoccupied and the far ones if not.

Caption: "Nott riding Hrimfaxi."
Nott is the goddess of night in Norse mythology. Hrimfaxi is her horse. She also has---as a Renaissance intrusion---a cherub (in the sense of putto).
Nott, night---you get it---you see, you understand Old Norse when you really, really try. Indo-European languages are all pretty much the same thing.
Credit/Permission: Peter Nicolai Arbo (1831--1892), 2nd half of the 19th century (uploaded to Wikipedia by User:Florian Huber, 2005) / Public domain.
Image linked to Wikipedia.
Below are some generic comments for
Lab 1: Constellations
that may often apply.
Caption: Film poster for the
TheMummy (1932)
starring Boris Karloff (1887--1969).
Credit/Permission: Employee or employees of
Universal Pictures
attributed to
Karoly Grosz (fl. 1930s),
1932
(uploaded to Wikipedia
by User:Crisco 1492,
2012) /
Public domain.
Image linked to Wikipedia.
Any that are semester-section-specific will have to added as needed.

